# What is DePHY
DePHY Introduction
The emergence of Decentralized Physical Infrastructure Networks (DePIN) represents a paradigm shift in how we approach infrastructure development and management. Traditional infrastructure systems are typically centralized, capital-intensive, and controlled by a small number of entities. DePIN introduces a new model where infrastructure deployment, maintenance, and operation are decentralized across numerous participants, incentivized through tokenization and blockchain technology.
DePHY has gained significant traction across various sectors, including telecommunications, energy distribution, data storage, and sensor networks. Our core innovation is the ability to coordinate and incentivize distributed infrastructure deployment without central coordination, leveraging blockchain technology's inherent properties of transparency, immutability, and programmable incentives.
Moreover, despite the promising potential, DePIN projects face significant challenges in achieving sustainable growth and efficient resource allocation. These challenges primarily stem from:
* Limited access to efficient capital allocation mechanisms
* Difficulty in maintaining long-term participant engagement
* Lack of standardized protocols for cross-network interaction
* Inefficient value capture and distribution methods
DePHY emerges as a response to these fundamental challenges, aiming to provide a comprehensive protocol layer that enables efficient financial mechanisms, sustainable growth, and enhanced network effects for DePIN projects.
# Key features
## DePHY DID
DePHY ID implements a robust DID (Device Identifier) system for access control in IoT device interactions. This comprehensive system enables secure device-to-device communication across decentralized networks while providing signature-based message authentication that ensures traceability and integrity proofs. Through its verifiable identity management approach, the system significantly reduces trust costs, making it an efficient solution for large-scale IoT deployments.
{% content-ref url="/pages/3xleXltxyuOAJGLuUuCU" %}
[DePHY ID \[Coming Soon\]](/components/dephy-id-coming-soon)
{% endcontent-ref %}
## Messaging Layer
The Messaging Layer is an event-driven communication system that provides efficient and reliable support for distributed device management and payment interactions. Leveraging a decentralized messaging protocol (Nostr) and blockchain technology (Solana) enables real-time device state synchronization, payment validation, and system scalability.
{% content-ref url="/pages/cEHgDv7NGBquDGHeLyQ4" %}
[Messaging layer 🔥](/components/messaging-layer)
{% endcontent-ref %}
## Liquidity Layer
Coming soon.
## Verification Layer
Verification layer represents a breakthrough in hardware validation for DePIN networks. This mechanism combines hardware attestation, performance metrics, and behavioral analysis to verify that participating devices are genuine physical infrastructure components rather than virtual simulations. By continuously monitoring device characteristics and operational patterns, the system maintains a high degree of confidence in the authenticity of network participants.
{% content-ref url="/pages/XhG1tyVNQj2gNuudpY9G" %}
[Verification layer](/components/verification-layer)
{% endcontent-ref %}
## DePHY Node
DePHY Nodes serve as the critical infrastructure backbone of the network, enabling secure and decentralized communication between DePIN devices and the Solana blockchain.
{% content-ref url="/pages/kCpESKqUMBbW871Qv5z7" %}
[Broken mention](broken://pages/kCpESKqUMBbW871Qv5z7)
{% endcontent-ref %}
# Architecture
DePHY Technical Atchitecture
The DePHY protocol implements a sophisticated multi-layered architecture to address key challenges in the DePIN ecosystem. At its foundation lies the Physical Infrastructure Layer, which is built with physical nodes to provide exceptional performance characteristics including high throughput and minimal latency. This foundation supports DePIN functionality and modular AI security through innovative restaking mechanisms.
Above this foundation, the Messaging Layer utilizes Nostr technology to create a robust event bus system, facilitating seamless device interactions within decentralized IoT networks. This layer incorporates DID-based access control to ensure secure and authenticated communications.
The Verification Layer builds upon this by implementing merkle-tree-based verification mechanisms, with restaking shared security, guaranteeing data integrity and enabling comprehensive auditability while ensuring trustless operation of all network components.
At the highest level, the Liquidity Layer built on Solana establishes a decentralized financial infrastructure specifically optimized for DePIN ecosystems. Leveraging Solana's high-throughput architecture capable of processing 65,000 transactions per second with sub-second finality, this layer implements three core mechanisms: 1) A dynamic liquidity pool system supporting real-time resource tokenization of physical infrastructure assets; 2) Automated market makers (AMMs) enabling seamless conversion between DePIN-generated data credits and mainstream cryptocurrencies; 3) A decentralized oracle network that verifies physical infrastructure status updates through merkle-proof consensus. The layer's novel bonding curve design incorporates real-time device telemetry data to dynamically adjust token issuance rates, creating an adaptive economic model that aligns digital asset liquidity with physical infrastructure utilization.
The applications built on DePHY delivers comprehensive solutions that span hardware integration, data transmission, computation, and blockchain integration.
This sophisticated layered architecture enables DePHY to provide a complete solution for DePIN projects that combines low latency and minimal fees with verifiable inputs while maintaining rigorous security standards through its restaking mechanism.
# Messaging layer 🔥
The Messaging Layer is an event-driven communication system that provides efficient and reliable support for distributed device management and payment interactions. Leveraging a decentralized messaging protocol (Nostr) and blockchain technology (Solana) enables real-time device state synchronization, payment validation, and system scalability.
It functions as an event bus built on a federated P2P network architecture, providing:
* Efficient communication between decentralized components through relay nodes that optimize network performance and reduce latency
* Comprehensive event sourcing and logging mechanisms that record all component operations and potential malicious behavior in an immutable format
* Enhanced transparency through sequential messaging and state reconstruction capabilities, reducing slashing risks through verifiable audit trails
* Resolution of connectivity challenges in P2P and HTTP RPC systems through:
* Dynamic topology adjustment for latency optimization
* Automated device discovery and hierarchical indexing
* Caching and route optimization at relay nodes
* Support for both automated discovery and manual specification for critical interactions
***
To set up your first DePHY app, we highly recommend following our tutorials:
{% content-ref url="/pages/lVSM4alqVzdebKwURwD2" %}
[Tutorials 🔥](/tutorials/build-a-hello-world-rust)
{% endcontent-ref %}
# Data Pub-Sub
DePHY DePIN Infra: Data pub-sub.
The Messaging Layer is built around a publish-subscribe (Pub-sub) model for data distribution, facilitating the exchange of device states and control commands across distributed nodes. This approach is particularly suited for scenarios requiring real-time responses, such as device management or user-initiated requests.
* **Event-Driven Communication**: The system defines specific event types (e.g., device state changes or user requests) to propagate messages between nodes. Nodes subscribe to relevant event streams and update their local state or trigger actions based on received events, ensuring low-latency and high-throughput messaging.
* **Decentralized Subscriptions**: By leveraging the Nostr protocol, the Messaging Layer allows multiple nodes (e.g., device controllers and servers) to subscribe to the same event source without relying on a centralized server. Subscribers can filter events by criteria like timestamps or device identifiers, processing only pertinent data.
* **Historical Data Synchronization**: The system supports retrieving events from a specified time window, enabling newly joined nodes to quickly sync historical states. This feature is critical for fault tolerance and state recovery during system startups, such as restoring a device’s latest status after a reboot.
* **Flexible Event Tagging**: Custom tags (e.g., session IDs and device public keys) enable precise message routing to target devices or processing logic. This flexibility supports multi-tenant environments or complex event distribution needs.
In practice, this mechanism tracks device availability or working status and broadcasts updates to all relevant parties, maintaining system-wide consistency.
## Hello World!
### Prerequisites
Before you begin, ensure you have the following installed:
* [Rust](https://www.rust-lang.org/tools/install)
### **Step 1: Create a Rust Workspace**
First, create a new directory for the project and navigate into it:
```bash
mkdir hello-world-ml
cd hello-world-ml
```
Next, create the packages inside the workspace:
```bash
cargo new subscriber --vcs none
cargo new publisher --vcs none
```
Finally, manually create a `Cargo.toml` file in the **root directory** for the workspace with the following content:
```toml
[workspace]
members = ["subscriber", "publisher"]
[workspace.dependencies]
nostr-sdk = "0.38.0"
nostr = "0.38.0"
tokio = { version = "1.38.0", features = ["full"] }
```
This ensures that both subscriber and publisher share the same dependency versions and avoids issues from creating the workspace `Cargo.toml` before the packages.
### **Step 2: Write the Subscriber Code**
Edit `subscriber/Cargo.toml` to use workspace dependencies:
```toml
[package]
name = "subscriber"
version = "0.1.0"
edition = "2021"
[dependencies]
tokio = { workspace = true }
nostr = { workspace = true }
nostr-sdk = { workspace = true }
```
Replace the contents of `subscriber/src/main.rs` with this code to subscribe to "Hello World" events:
```rust
use nostr::{key::Keys, types::{SingleLetterTag, Timestamp}, Kind};
use nostr_sdk::{Client, Filter, RelayPoolNotification};
const MENTION_TAG: SingleLetterTag = SingleLetterTag::lowercase(nostr::Alphabet::P);
const SESSION_TAG: SingleLetterTag = SingleLetterTag::lowercase(nostr::Alphabet::S);
#[tokio::main]
async fn main() -> Result<(), Box> {
// Initialize the Nostr client
let keys: Keys = Keys::generate();
let client_opts = nostr_sdk::Options::default();
let client = Client::builder()
.signer(keys.clone())
.opts(client_opts)
.build();
client.add_relay("wss://dev-relay.dephy.dev").await?;
client.connect().await;
// Define a filter for "Hello World" events
let filter = Filter::new()
.kind(Kind::Custom(1573))
.since(Timestamp::now())
.custom_tag(SESSION_TAG, ["hello_session"])
.custom_tag(MENTION_TAG, ["receiver_pubkey"]);
// Subscribe to the filter
client.subscribe(vec![filter], None).await?;
println!("Subscribed events on wss://dev-relay.dephy.dev");
// Handle notifications asynchronously
client
.handle_notifications(|notification| async {
match notification {
RelayPoolNotification::Event { event, .. } => {
println!("Received: {}", event.content);
}
_ => {} // Ignore other notification types
}
Ok(false) // Keep listening (false means don't stop)
})
.await?;
Ok(())
}
```
### **Step 3: Write the Publisher Code**
Edit `publisher/Cargo.toml` to use workspace dependencies:
```toml
[package]
name = "publisher"
version = "0.1.0"
edition = "2021"
[dependencies]
tokio = { workspace = true }
nostr = { workspace = true }
nostr-sdk = { workspace = true }
```
Edit `publisher/src/main.rs` :
```rust
use nostr::{key::Keys, Kind};
use nostr_sdk::{Client, EventBuilder, Options, Tag};
#[tokio::main]
async fn main() -> Result<(), Box> {
// Initialize the Nostr client
let keys: Keys = Keys::generate(); // Generate a keypair for the publisher
let client_opts = Options::default();
let client = Client::builder()
.signer(keys.clone())
.opts(client_opts)
.build();
client.add_relay("wss://dev-relay.dephy.dev").await?;
client.connect().await;
// Create and send a "Hello World" event
let event = EventBuilder::new(Kind::Custom(1573), "Hello World").tags([
Tag::parse(["s".to_string(), "hello_session".to_string()]).unwrap(),
Tag::parse(["p".to_string(), "receiver_pubkey".to_string()]).unwrap(),
]);
client.send_event_builder(event).await?;
println!("Published 'Hello World' event to wss://dev-relay.dephy.dev");
Ok(())
}
```
### **Step 4: Compile and Run**:
* Run the `Subscriber`:
```bash
cargo run -p subscriber
```
This starts the subscriber, which will wait for events.
* Run the `Publisher` (in a new terminal):
```bash
cargo run -p publisher
```
* Expected Output:
* `Subscriber` terminal:
```
Subscribed events on wss://dev-relay.dephy.dev
```
* `Publisher` terminal:
Published 'Hello World' event to wss://dev-relay.dephy.dev
* `Subscriber` terminal:
```
Received: Hello World
```
# Solana Integration
DePHY DePIN Infra: Solana Integration.
The integration with Solana enhances the Messaging Layer’s capabilities for payment processing and authorization, offering a decentralized solution for paid device usage. This integration ensures transaction security and automates payment workflows.
* **Payment Validation**: The system uses Solana’s RPC interface to verify user payment eligibility. For instance, before a device transitions to a working state, it checks if the user has prepaid sufficient funds. This ensures fairness and economic incentives for service usage.
* **State-Payment Linkage**: Device state changes (e.g., from “available” to “working”) trigger corresponding payment actions. When a device starts working, the system locks the user’s prepaid funds; upon completion, the actual cost is settled and transferred. This linkage is driven by messaging events, minimizing manual intervention.
* **Fault Tolerance and Error Handling**: If a payment operation fails (e.g., due to insufficient funds), the system automatically reverts the device state and notifies stakeholders. This design enhances robustness, preventing inconsistencies due to payment issues.
* **Scalability**: Solana’s high throughput and low transaction costs make it ideal for managing payments across a large device network. The Messaging Layer leverages this to support extensive deployments without performance bottlenecks.
In your application, this integration manifests as collaboration between device controllers and servers: controllers initiate state change requests, while servers validate payments and confirm updates, all seamlessly connected via the messaging layer.
## Hello World (Integrate Solana)!
### Prerequisites
Before you begin, ensure you have the following installed:
* [Rust](https://www.rust-lang.org/tools/install)
* ["Hello World" chapter](/components/messaging-layer/data-pub-sub)
### Step 1: Update the Workspace Dependencies
```toml
[workspace]
members = ["subscriber", "publisher"]
[dependencies]
nostr-sdk = "0.38.0"
nostr = "0.38.0"
solana-sdk = "2.2.2"
solana-client = "2.2.6"
serde_json = "1.0.140"
serde = "1.0.219"
tokio = { version = "1.38.0", features = ["full"] }
```
### Step 2: Update the Publisher
Edit `publisher/Cargo.toml` to use workspace dependencies:
```toml
[package]
name = "publisher"
version = "0.1.0"
edition = "2021"
[dependencies]
tokio = { workspace = true }
nostr = { workspace = true }
nostr-sdk = { workspace = true }
solana-sdk = { workspace = true }
serde = { workspace = true }
serde_json = { workspace = true }
```
Replace the contents of `publisher/src/main.rs` with this code to publish a message with a Solana public key:
```rust
use nostr::{key::Keys, Kind};
use nostr_sdk::{Client, EventBuilder, Options, Tag};
use serde::Serialize;
use solana_sdk::{signature::Keypair, signer::Signer};
#[derive(Serialize)]
struct Message {
greeting: String,
solana_pubkey: String,
}
#[tokio::main]
async fn main() -> Result<(), Box> {
// Generate Solana keypair
let solana_keypair = Keypair::new();
let solana_pubkey = solana_keypair.pubkey().to_string();
// Initialize the Nostr client
let keys: Keys = Keys::generate(); // Generate a keypair for the publisher
let client_opts = Options::default();
let client = Client::builder()
.signer(keys.clone())
.opts(client_opts)
.build();
client.add_relay("wss://dev-relay.dephy.dev").await?;
client.connect().await;
// Create message struct
let message = Message {
greeting: "Hello World".to_string(),
solana_pubkey: solana_pubkey.clone(),
};
// Create and send a "Hello World" event
let event = EventBuilder::new(Kind::Custom(1573), serde_json::to_string(&message)?).tags([
Tag::parse(["s".to_string(), "hello_session".to_string()])?,
Tag::parse(["p".to_string(), "receiver_pubkey".to_string()])?,
]);
client.send_event_builder(event).await?;
println!("Published 'Hello World' event to wss://dev-relay.dephy.dev");
println!("Airdrop request for {}", solana_pubkey);
Ok(())
}
```
### Step 3: Update the Subscriber
Edit `subscriber/Cargo.toml` to use workspace dependencies:
```toml
[package]
name = "subscriber"
version = "0.1.0"
edition = "2021"
[dependencies]
tokio = { workspace = true }
nostr = { workspace = true }
nostr-sdk = { workspace = true }
solana-sdk = { workspace = true }
solana-client = { workspace = true }
serde = { workspace = true }
serde_json = { workspace = true }
```
Replace the contents of `subscriber/src/main.rs` with this code to subscribe to events and request a Solana airdrop:
```rust
use nostr::{key::Keys, types::{SingleLetterTag, Timestamp}, Kind};
use nostr_sdk::{Client, Filter, RelayPoolNotification};
use serde::Deserialize;
use solana_client::rpc_client::RpcClient;
use solana_sdk::pubkey::Pubkey;
use std::str::FromStr;
#[derive(Deserialize)]
struct Message {
greeting: String,
solana_pubkey: String,
}
const MENTION_TAG: SingleLetterTag = SingleLetterTag::lowercase(nostr::Alphabet::P);
const SESSION_TAG: SingleLetterTag = SingleLetterTag::lowercase(nostr::Alphabet::S);
#[tokio::main]
async fn main() -> Result<(), Box> {
// Initialize the Nostr client
let keys: Keys = Keys::generate();
let client_opts = nostr_sdk::Options::default();
let client = Client::builder()
.signer(keys.clone())
.opts(client_opts)
.build();
client.add_relay("wss://dev-relay.dephy.dev").await?;
client.connect().await;
// Define a filter for "Hello World" events
let filter = Filter::new()
.kind(Kind::Custom(1573))
.since(Timestamp::now())
.custom_tag(SESSION_TAG, ["hello_session"])
.custom_tag(MENTION_TAG, ["receiver_pubkey"]);
// Subscribe to the filter
client.subscribe(vec![filter], None).await?;
println!("Subscribed events on wss://dev-relay.dephy.dev");
// Initialize Solana testnet client
let solana_client = RpcClient::new("https://api.devnet.solana.com".to_string());
// Handle notifications asynchronously
client
.handle_notifications(|notification| async {
match notification {
RelayPoolNotification::Event { event, .. } => {
println!("Received {}", event.content);
// Parse the JSON content
if let Ok(message) = serde_json::from_str::(&event.content) {
// Request airdrop to the solana_pubkey
if let Ok(pubkey) = Pubkey::from_str(&message.solana_pubkey) {
match solana_client.request_airdrop(&pubkey, 1_000_000_000) {
Ok(signature) => {
println!(
"Airdrop requested for {}. Signature: {}",
pubkey, signature
);
if let Ok(confirmed) =
solana_client.confirm_transaction(&signature)
{
if confirmed {
println!("Airdrop confirmed for {}", pubkey);
}
}
}
Err(e) => println!("Airdrop failed: {:?}", e),
}
} else {
println!("Invalid Solana pubkey: {}", message.solana_pubkey);
}
} else {
println!("Failed to parse message content");
}
}
_ => {} // Ignore other notification types
}
Ok(false) // Keep listening (false means don't stop)
})
.await?;
Ok(())
}
```
### Step 4: Compile and Run
* Run the `Subscriber` (in one terminal):
```bash
cargo run -p subscriber
```
* Run the `Publisher` (in a new terminal):
```bash
cargo run -p publisher
```
* Expected Output:
* `Subscriber` terminal:
```
Subscribed events on wss://dev-relay.dephy.dev
```
* `Publisher` terminal:
Published 'Hello World' event to wss://dev-relay.dephy.dev
  Airdrop request for [ ... ]
* `Subscriber` terminal:
```
Received: {"greeting":"Hello World","solana_pubkey":"..."}
Airdrop requested for ... Signature: ...
Airdrop confirmed for ...
```
## Next Steps
This example demonstrates a basic integration between `Messaging Layer` and `Solana`. You could extend this further by:
* Deploying a Solana smart contract (program) to handle more complex interactions
* Using Nostr events to trigger contract calls
* Implementing payment verification or other blockchain-based logic
* Adding error handling and retry mechanisms for airdrop requests
This simple integration opens the door to building decentralized applications that combine messaging capabilities with Solana's high-performance blockchain.
# RPC Call
## Connecting to the Messaging Layer
To interact with the Messaging Layer, you have two options: connect to DePHY’s public relay URL or deploy a local instance. Choose based on your needs—public for simplicity, local for development or control.
### 1. Use DePHY’s Relay URL
PRC Endpoints can be found here:
{% content-ref url="/pages/jlbmVPKD8ZIIFQrbV3vf" %}
[RPC Endpoints](/components/messaging-layer/rpc-endpoints)
{% endcontent-ref %}
### 2. Local Deployment
* **Prerequisites**:
* Docker: Ensure [Docker](https://docs.docker.com/get-docker/) is installed and running on your system to manage the messaging network services.
* **Steps**:
1. Clone the repository:
```bash
git clone https://github.com/dephy-io/dephy-messaging-network-self-hosted.git
cd dephy-messaging-network-self-hosted/dephy-messaging-network
```
2. Launch the messaging layer using Docker Compose:
```bash
docker compose up --pull always
```
This deploys a self-hosted Nostr-based messaging network locally, ready to handle event subscriptions and publications for your DePHY applications. By default, it will be accessible at `wss://localhost:8080`.
## Recommended Messaging Layer Client
Below are recommended libraries for interacting with the Nostr protocol across multiple programming languages, with hyperlinks to their official repositories or documentation.
### **Rust**
* [nostr-sdk](https://github.com/rust-nostr/nostr/tree/master/crates/nostr-sdk)
* [nostr](https://github.com/rust-nostr/nostr/tree/master/crates/nostr)
### **JavaScript/TypeScript**
* [nostr-tools](https://github.com/nbd-wtf/nostr-tools)
* [nostr-relay](https://github.com/fiatjaf/nostr-relay)
### **Python**
* [pynostr](https://github.com/fernandoporazi/pynostr)
* [nostr-py](https://github.com/monty888/nostr-py)
### **Go**
* [go-nostr](https://github.com/nbd-wtf/go-nostr)
### **Kotlin**
* [nostr-kotlin](https://github.com/derkan/nostr-kotlin)
### **Swift**
* [NostrKit](https://github.com/lzich/NostrKit)
# RPC Endpoints
DePHY RPC Endpoints
### Devnets
Name
Endpoint
Description
Devnet
wss://dev-relay.dephy.dev
Official devnet
### Testnets
Name
Endpoint
Description
Testnet
wss://testnet2-relay.dephy.dev
Official testnet
### Mainnet Beta
Name
Endpoint
Description
Mainnet Beta
Comming Soon
# Best Practices
To ensure the Messaging Layer’s stability and maintainability in production, the following best practices are derived from your code’s application context and are applicable to similar event-driven systems.
* **Auto Reconnection**:
Network interruptions, relay downtime, or intentional connection closures can disrupt message flow, making automatic reconnection a key requirement. A well-implemented reconnection strategy ensures the system recovers gracefully from failures without overwhelming resources or losing events.
1. For **TS/JS** developers, we implement a custom reconnection mechanism with exponential backoff for the `nostr-tools` library:
```typescript
import { Relay } from "nostr-tools/relay";
// Configuration constants
const RELAY_URL = "wss://dev-relay.dephy.dev";
const RECONNECT_DELAY_INITIAL_MS = 1000; // Initial reconnect delay (1 second)
const RECONNECT_DELAY_MAX_MS = 30000; // Maximum reconnect delay (30 seconds)
const RECONNECT_MAX_ATTEMPTS = 10; // Maximum reconnection attempts (optional)
// Global variables to manage connection state
let relay: Relay | null = null; // Active relay connection
let reconnectAttempts = 0; // Track number of reconnection attempts
let reconnectDelay = RECONNECT_DELAY_INITIAL_MS; // Current reconnect delay
/**
* Establishes connection to the Nostr relay and sets up event subscription.
* Handles automatic reconnection on failure.
*/
async function connectToRelay() {
try {
console.log(`Connecting to relay: ${RELAY_URL}...`);
// Attempt to connect to the relay
relay = await Relay.connect(RELAY_URL);
// Reset reconnection state on successful connection
reconnectAttempts = 0;
reconnectDelay = RECONNECT_DELAY_INITIAL_MS;
console.log("Connected to relay. Subscribing to events...");
// Subscribe to events matching the specified filter
relay.subscribe(
[
{
kinds: [1573], // Event kind (1573 for custom messages)
since: Math.floor(Date.now() / 1000), // Timestamp in seconds
"#s": ["hello_session"], // 's' tag filter
"#p": ["receiver_pubkey"], // 'p' tag filter
},
],
{
// Callback for received events
onevent: (event) => {
console.log("Received:", event.content);
},
}
);
/**
* Handle connection closure.
* This callback triggers when the relay intentionally closes the connection.
*/
relay.onclose = () => {
console.log("Connection closed by relay. Attempting to reconnect...");
scheduleReconnect();
};
} catch (err) {
// Handle initial connection failures
console.error("Initial connection failed:", err);
scheduleReconnect();
}
}
/**
* Schedules a reconnection attempt using exponential backoff.
* Increases delay between attempts up to RECONNECT_DELAY_MAX_MS.
*/
function scheduleReconnect() {
// Stop reconnecting after maximum attempts
if (reconnectAttempts >= RECONNECT_MAX_ATTEMPTS) {
console.error("Maximum reconnection attempts reached. Terminating.");
return;
}
reconnectAttempts++;
console.log(`Next reconnection attempt in ${reconnectDelay / 1000} seconds... (Attempt ${reconnectAttempts})`);
// Schedule reconnection with increasing delay
setTimeout(() => {
connectToRelay();
// Exponential backoff: double delay each time (capped at max delay)
reconnectDelay = Math.min(reconnectDelay * 2, RECONNECT_DELAY_MAX_MS);
}, reconnectDelay);
}
// Graceful shutdown handler (e.g., Ctrl+C)
process.on("SIGINT", () => {
console.log("Terminating gracefully...");
if (relay) {
relay.close(); // Properly close the connection
}
process.exit(0); // Exit with success code
});
// Start initial connection
connectToRelay();
```
2. For **Rust** developers using the Nostr library (e.g., `nostr-sdk`), reconnection is handled natively by the library so developers don’t need to implement manual reconnection.
3. For **Go** developers, a reconnection mechanism for Nostr relays is not yet standardized in popular libraries as of April 2025. Developers may need to implement a custom solution similar to the TypeScript example above, examples repo at: .
* **Event Consistency**: Always validate message sources and targets to avoid processing unauthorized or irrelevant events. For example, when updating device states, confirm that the message originates from a legitimate admin or user request.
* **Error Handling and Logging**: Equip each operation (subscriptions, payment validation, state changes) with detailed logging and implement graceful error recovery on critical paths. For instance, if a payment fails, revert the state and notify stakeholders promptly.
* **Time Synchronization**: Since the system relies on timestamps for event filtering and ordering, periodically verify time consistency across nodes to prevent event loss or duplicate processing due to drift.
* **Resource Management**: When subscribing to numerous events or managing multiple devices, set reasonable limits on notification queue sizes and subscription exit policies to prevent memory overflow or performance degradation. Your code demonstrates this by configuring maximum notification sizes.
* **Security**: Safeguard keys and payment-related data (e.g., Solana keypairs) and ensure message content is encrypted or signed to prevent tampering or forgery. Nostr’s public key system provides a foundational layer of security here.
* **Testing and Simulation**: Before deployment, test system behavior with simulated events and payment scenarios, especially under high concurrency or network disruptions. This helps identify edge cases and potential issues.
These practices are partially reflected in your code, such as avoiding redundant operations via state checks and using logs for debugging. Adhering to these guidelines can further enhance the system’s reliability and scalability.
# Verifiable logs
Coming soon™
# DePHY ID \[Coming Soon]
DePHY ID implements a robust DID (Device Identifier) system for access control in IoT device interactions. This comprehensive system enables secure device-to-device communication across decentralized networks while providing signature-based message authentication that ensures traceability and integrity proofs. Through its verifiable identity management approach, the system significantly reduces trust costs, making it an efficient solution for large-scale IoT deployments.
The DID framework provides comprehensive identity management throughout a device’s lifecycle, from production to decommissioning. This mechanism prevents device forgery and tampering while ensuring transparent data provenance, facilitating trust in complex scenarios.
The DID implementation in DePHY follows W3C standards and employs a hierarchical structure to\
manage device identities. At its core, each device is assigned a unique DID that serves as its perma-\
nent identifier within the network. This identifier is generated through a combination of device-specific\
attributes and cryptographic keys, ensuring uniqueness and security.
The DID resolution process involves multiple layers of verification. When a device attempts to communicate within the network, its DID document is retrieved and validated. This document contains essential information including public keys, authentication methods, and service endpoints. The validation process verifies the cryptographic proofs associated with the DID, ensuring the device’s authenticity.
Key management in the DID system utilizes a sophisticated rotation mechanism. Devices can up-\
date their authentication credentials while maintaining their base identity, enabling secure key rotation\
without disrupting existing relationships or permissions. This is particularly crucial for long-term device\
deployment where periodic key updates are necessary for security maintenance.
# Register products
Coming soon™
# Mint DID
Coming soon™
# Use DID as token gate (access control)
Coming soon™
# Extentions
Coming soon™
# Build with DePHY ID
Coming soon™
# Hardware integration and attestation
Coming soon™
# Liquidity layer
Resource circulation efficiency is one of the most pressing technical challenges facing the DePIN industry today. The physical nature of DePIN devices creates inherent limitations in resource mobility, resulting in significantly underutilized network capacity for device operators. This fundamental issue has constrained network growth, with DePIN projects struggling to achieve scale beyond their immediate resource base due to limited transferable network components.
The challenge is compounded by participants' difficulties in reallocating network positions. Unlike purely digital systems, DePIN participation often involves physical hardware acquired through direct transactions, leaving participants without access to advanced resource management tools that could optimize their network engagement strategies.
This circulation constraint creates a ripple effect throughout the entire DePIN ecosystem. The slow mobility of physical resources makes it challenging to transform infrastructure components into readily exchangeable network units. Without efficient mechanisms for value verification and resource deployment, the ecosystem's growth potential remains constrained, hindering the industry's sustainable expansion and broader network adoption.
The theoretical foundation refers to the underlying mathematical and technical principles that form the basis for DePHY's resource circulation system, which bridges physical infrastructure networks with verification mechanisms. DePHY's circulation system is built upon several key mathematical and technical principles. At its core, Resource Tokenization Framework provides mathematical models for converting physical infrastructure into verifiable tokens while preserving accurate value representation and network assessment. This is complemented by Network Premium Modeling, which utilizes mathematical frameworks to calculate and optimize the network premium for DePIN resources by considering factors like resource utilization metrics, network performance parameters, and system demand dynamics. The system also incorporates Stochastic Process Integration, employing advanced mathematical models with Brownian motion and other stochastic processes to model DePIN resource values and network performance over time. Game Theory Equilibrium ensures all participants are incentivized towards optimal behavior that benefits the entire network. At the same time, Network Optimization employs sophisticated mathematical models to optimize the network engagement profile through allocation theory and modern verification techniques.
These theoretical foundations are complemented by system design principles including:
* Network Effect Valuation - System models that quantify and maximize the network effects generated by DePIN infrastructure deployment
* Incentive Mechanism Design - Technical frameworks ensuring proper alignment of interests across all network participants
* Value Discovery Mechanisms - System models facilitating efficient value discovery for DePIN resources while minimizing network manipulation risks
* Resource Efficiency Optimization - Technical principles governing the optimal allocation of resources across different DePIN projects and infrastructure types
Together, these mathematical and technical foundations provide the theoretical framework necessary for DePHY's innovative resource circulation system, enabling efficient network allocation while maintaining system stability and security.
# Stake Pool
# Yield Pool
# PayFi Pool
# Verification layer
Verification layer represents a breakthrough in hardware validation for DePIN networks. This mechanism combines hardware attestation, performance metrics, and behavioral analysis to verify that participating devices are genuine physical infrastructure components rather than virtual simulations. By continuously monitoring device characteristics and operational patterns, the system maintains a high degree of confidence in the authenticity of network participants.
# Proof of real device
Coming soon™
# Integration
Coming soon™
# Proof of location
The Proof of Location (PoL) mechanism is the foundational trust layer for Decentralized Physical Infrastructure Networks (DePIN), verifying physical geographical coordinates and digital network positioning. Our system establishes device location by synthesizing satellite GPS data, third-party location services, and distributed node consensus, creating cryptographically-secure proofs anchored in multiple reality layers.
# Integration
Coming soon™
# DePHY NCN (on Jito Restaking)
Coming soon™
# Integration
Coming soon™
# Trusted DePIN network map
Coming soon™
# Integration
Coming soon™
# Build a Hello World (Rust)
## Prerequisites
Before you begin, ensure you have the following installed:
* [Rust](https://www.rust-lang.org/tools/install)
***
## **Step 1: Create a Rust Workspace**
First, create a new directory for the project and navigate into it:
```bash
mkdir hello-world-ml
cd hello-world-ml
```
Next, create the packages inside the workspace:
```bash
cargo new subscriber --vcs none
cargo new publisher --vcs none
```
Finally, manually create a `Cargo.toml` file in the **root directory** for the workspace with the following content:
```toml
[workspace]
members = ["subscriber", "publisher"]
[workspace.dependencies]
nostr-sdk = "0.38.0"
nostr = "0.38.0"
tokio = { version = "1.38.0", features = ["full"] }
```
This ensures that both subscriber and publisher share the same dependency versions and avoids issues from creating the workspace `Cargo.toml` before the packages.
***
## **Step 2: Write the Subscriber Code**
Edit `subscriber/Cargo.toml` to use workspace dependencies:
```toml
[package]
name = "subscriber"
version = "0.1.0"
edition = "2021"
[dependencies]
tokio = { workspace = true }
nostr = { workspace = true }
nostr-sdk = { workspace = true }
```
Replace the contents of `subscriber/src/main.rs` with this code to subscribe to "Hello World" events:
```rust
use nostr::{key::Keys, types::{SingleLetterTag, Timestamp}, Kind};
use nostr_sdk::{Client, Filter, RelayPoolNotification};
const MENTION_TAG: SingleLetterTag = SingleLetterTag::lowercase(nostr::Alphabet::P);
const SESSION_TAG: SingleLetterTag = SingleLetterTag::lowercase(nostr::Alphabet::S);
#[tokio::main]
async fn main() -> Result<(), Box> {
// Initialize the Nostr client
let keys: Keys = Keys::generate();
let client_opts = nostr_sdk::Options::default();
let client = Client::builder()
.signer(keys.clone())
.opts(client_opts)
.build();
client.add_relay("wss://dev-relay.dephy.dev").await?;
client.connect().await;
// Define a filter for "Hello World" events
let filter = Filter::new()
.kind(Kind::Custom(1573))
.since(Timestamp::now())
.custom_tag(SESSION_TAG, ["hello_session"])
.custom_tag(MENTION_TAG, ["receiver_pubkey"]);
// Subscribe to the filter
client.subscribe(vec![filter], None).await?;
println!("Subscribed events on wss://dev-relay.dephy.dev");
// Handle notifications asynchronously
client
.handle_notifications(|notification| async {
match notification {
RelayPoolNotification::Event { event, .. } => {
println!("Received: {}", event.content);
}
_ => {} // Ignore other notification types
}
Ok(false) // Keep listening (false means don't stop)
})
.await?;
Ok(())
}
```
***
## **Step 3: Write the Publisher Code**
Edit `publisher/Cargo.toml` to use workspace dependencies:
```toml
[package]
name = "publisher"
version = "0.1.0"
edition = "2021"
[dependencies]
tokio = { workspace = true }
nostr = { workspace = true }
nostr-sdk = { workspace = true }
```
Edit `publisher/src/main.rs` :
```rust
use nostr::{key::Keys, Kind};
use nostr_sdk::{Client, EventBuilder, Options, Tag};
#[tokio::main]
async fn main() -> Result<(), Box> {
// Initialize the Nostr client
let keys: Keys = Keys::generate(); // Generate a keypair for the publisher
let client_opts = Options::default();
let client = Client::builder()
.signer(keys.clone())
.opts(client_opts)
.build();
client.add_relay("wss://dev-relay.dephy.dev").await?;
client.connect().await;
// Create and send a "Hello World" event
let event = EventBuilder::new(Kind::Custom(1573), "Hello World").tags([
Tag::parse(["s".to_string(), "hello_session".to_string()]).unwrap(),
Tag::parse(["p".to_string(), "receiver_pubkey".to_string()]).unwrap(),
]);
client.send_event_builder(event).await?;
println!("Published 'Hello World' event to wss://dev-relay.dephy.dev");
Ok(())
}
```
***
## **Step 4: Compile and Run**:
* Run the `Subscriber`:
```bash
cargo run -p subscriber
```
This starts the subscriber, which will wait for events.
* Run the `Publisher` (in a new terminal):
```bash
cargo run -p publisher
```
* Expected Output:
* `Subscriber` terminal:
```
Subscribed events on wss://dev-relay.dephy.dev
```
* `Publisher` terminal:
Published 'Hello World' event to wss://dev-relay.dephy.dev
* `Subscriber` terminal:
```
Received: Hello World
```
🎉At this point, the basic publish and subscribe functionality is complete, and the command line has output the results we expected!
Next, we will enhance this by integrating with the Solana blockchain and the Messaging Layer.Specifically, when publishing a greeting like "Hello World," the publisher will request a Solana airdrop.
***
## Step 5: Update the Workspace Dependencies
```toml
[workspace]
members = ["subscriber", "publisher"]
[dependencies]
tokio = { workspace = true }
nostr = { workspace = true }
nostr-sdk = { workspace = true }
solana-sdk = { workspace = true }
serde = { workspace = true }
serde_json = { workspace = true }
```
***
## Step 6: Update the Publisher
Replace the contents of `publisher/src/main.rs` with this code to publish a message with a Solana public key:
```rust
use nostr::{key::Keys, Kind};
use nostr_sdk::{Client, EventBuilder, Options, Tag};
use serde::Serialize;
use solana_sdk::{signature::Keypair, signer::Signer};
#[derive(Serialize)]
struct Message {
greeting: String,
solana_pubkey: String,
}
#[tokio::main]
async fn main() -> Result<(), Box> {
// Generate Solana keypair
let solana_keypair = Keypair::new();
let solana_pubkey = solana_keypair.pubkey().to_string();
// Initialize the Nostr client
let keys: Keys = Keys::generate(); // Generate a keypair for the publisher
let client_opts = Options::default();
let client = Client::builder()
.signer(keys.clone())
.opts(client_opts)
.build();
client.add_relay("wss://dev-relay.dephy.dev").await?;
client.connect().await;
// Create message struct
let message = Message {
greeting: "Hello World".to_string(),
solana_pubkey: solana_pubkey.clone(),
};
// Create and send a "Hello World" event
let event = EventBuilder::new(Kind::Custom(1573), serde_json::to_string(&message)?).tags([
Tag::parse(["s".to_string(), "hello_session".to_string()])?,
Tag::parse(["p".to_string(), "receiver_pubkey".to_string()])?,
]);
client.send_event_builder(event).await?;
println!("Published 'Hello World' event to wss://dev-relay.dephy.dev");
println!("Airdrop request for {}", solana_pubkey);
Ok(())
}
```
***
## Step 7: Update the Subscriber
Edit `subscriber/Cargo.toml` to use workspace dependencies:
```toml
[package]
name = "subscriber"
version = "0.1.0"
edition = "2021"
[dependencies]
tokio = { workspace = true }
nostr = { workspace = true }
nostr-sdk = { workspace = true }
solana-sdk = { workspace = true }
solana-client = { workspace = true }
serde = { workspace = true }
serde_json = { workspace = true }
```
Replace the contents of `subscriber/src/main.rs` with this code to subscribe to events and request a Solana airdrop:
```rust
use nostr::{key::Keys, types::{SingleLetterTag, Timestamp}, Kind};
use nostr_sdk::{Client, Filter, RelayPoolNotification};
use serde::Deserialize;
use solana_client::rpc_client::RpcClient;
use solana_sdk::pubkey::Pubkey;
use std::str::FromStr;
#[derive(Deserialize)]
struct Message {
greeting: String,
solana_pubkey: String,
}
const MENTION_TAG: SingleLetterTag = SingleLetterTag::lowercase(nostr::Alphabet::P);
const SESSION_TAG: SingleLetterTag = SingleLetterTag::lowercase(nostr::Alphabet::S);
#[tokio::main]
async fn main() -> Result<(), Box> {
// Initialize the Nostr client
let keys: Keys = Keys::generate();
let client_opts = nostr_sdk::Options::default();
let client = Client::builder()
.signer(keys.clone())
.opts(client_opts)
.build();
client.add_relay("wss://dev-relay.dephy.dev").await?;
client.connect().await;
// Define a filter for "Hello World" events
let filter = Filter::new()
.kind(Kind::Custom(1573))
.since(Timestamp::now())
.custom_tag(SESSION_TAG, ["hello_session"])
.custom_tag(MENTION_TAG, ["receiver_pubkey"]);
// Subscribe to the filter
client.subscribe(vec![filter], None).await?;
println!("Subscribed events on wss://dev-relay.dephy.dev");
// Initialize Solana testnet client
let solana_client = RpcClient::new("https://api.devnet.solana.com".to_string());
// Handle notifications asynchronously
client
.handle_notifications(|notification| async {
match notification {
RelayPoolNotification::Event { event, .. } => {
println!("Received {}", event.content);
// Parse the JSON content
if let Ok(message) = serde_json::from_str::(&event.content) {
// Request airdrop to the solana_pubkey
if let Ok(pubkey) = Pubkey::from_str(&message.solana_pubkey) {
match solana_client.request_airdrop(&pubkey, 1_000_000_000) {
Ok(signature) => {
println!(
"Airdrop requested for {}. Signature: {}",
pubkey, signature
);
if let Ok(confirmed) =
solana_client.confirm_transaction(&signature)
{
if confirmed {
println!("Airdrop confirmed for {}", pubkey);
}
}
}
Err(e) => println!("Airdrop failed: {:?}", e),
}
} else {
println!("Invalid Solana pubkey: {}", message.solana_pubkey);
}
} else {
println!("Failed to parse message content");
}
}
_ => {} // Ignore other notification types
}
Ok(false) // Keep listening (false means don't stop)
})
.await?;
Ok(())
}
```
***
## Step 8: Compile and Run
* Run the `Subscriber` (in one terminal):
```bash
cargo run -p subscriber
```
* Run the `Publisher` (in a new terminal):
```bash
cargo run -p publisher
```
* Expected Output:
* `Subscriber` terminal:
```
Subscribed events on wss://dev-relay.dephy.dev
```
* `Publisher` terminal:
Published 'Hello World' event to wss://dev-relay.dephy.dev
  Airdrop request for [ ... ]
* `Subscriber` terminal:
```
Received: {"greeting":"Hello World","solana_pubkey":"..."}
Airdrop requested for ... Signature: ...
Airdrop confirmed for ...
```
***
## Next Steps
This example demonstrates a basic integration between `Messaging Layer` and `Solana`. You could extend this further by:
* Deploying a Solana smart contract (program) to handle more complex interactions
* Using Nostr events to trigger contract calls
* Implementing payment verification or other blockchain-based logic
* Adding error handling and retry mechanisms for airdrop requests
This simple integration opens the door to building decentralized applications that combine messaging capabilities with Solana's high-performance blockchain.
# Build a Hello World (TypeScript)
### Prerequisites
Before you begin, ensure you have the following installed:
* [Bun](https://bun.sh)
***
### Step 1: Create a Bun Project
First, create a new project directory and initialize it with Bun:
```bash
mkdir hello-world-ml
cd hello-world-ml
bun init -y
```
Next, install the required dependencies:
```bash
bun add nostr-tools @solana/web3.js
```
***
### Step 2: Write the Subscriber Code
Create a file named `subscriber.ts` and add the following code. This script connects to the Nostr relay, subscribes to "Hello World" events (custom kind 1573), and logs any received messages.
```ts
// subscriber.ts
import { Relay } from "nostr-tools/relay";
const RELAY_URL = "wss://dev-relay.dephy.dev";
async function main() {
const relay = await Relay.connect(RELAY_URL);
console.log("Subscribed events on", RELAY_URL);
relay.subscribe(
[
{
kinds: [1573],
since: Math.floor(Date.now() / 1000),
"#s": ["hello_session"],
"#p": ["receiver_pubkey"],
},
],
{
onevent: async (event) => {
console.log("Received:", event.content);
},
}
);
}
main().catch(console.error);
```
***
### Step 3: Write the Publisher Code
Create a file named `publisher.ts` and insert the following code. This script sends a simple "Hello World" event to the relay using a Nostr event with custom tags.
```typescript
// publisher.ts
import { finalizeEvent, generateSecretKey } from "nostr-tools/pure";
import { Relay } from "nostr-tools/relay";
const RELAY_URL = "wss://dev-relay.dephy.dev";
async function main() {
const relay = await Relay.connect(RELAY_URL);
const eventTemplate = {
kind: 1573,
created_at: Math.floor(Date.now() / 1000),
tags: [
['s', "hello_session"],
['p', "receiver_pubkey"],
],
content: "Hello World",
};
const sk = generateSecretKey();
const event = finalizeEvent(eventTemplate, sk);
await relay.publish(event);
console.log("Published 'Hello World' event to", RELAY_URL);
}
main().catch(console.error);
```
***
### Step 4: Run the "Hello World" Example
Open two terminals (or tabs):
* Run the `Subscriber`:
```bash
bun run subscriber.ts
```
* Run the `Publisher` (in a new terminal):
```bash
bun run publisher.ts
```
* Expected Output:
* `Subscriber` terminal:
```
Subscribed events on wss://dev-relay.dephy.dev
```
* `Publisher` terminal:
Published 'Hello World' event to wss://dev-relay.dephy.dev
* `Subscriber` terminal:
```
Received: Hello World
```
***
### Next, Enhance the Functionality with Solana Airdrop
At this point, the basic publish and subscribe functionality is complete. Next, we will enhance this by integrating with the Solana blockchain. Specifically, when publishing a greeting like "Hello World," the publisher will include a Solana public key, and the subscriber will request a Solana airdrop.
***
### Step 5: Update the Publisher
Edit `publisher.ts` to include a structured message and a Solana public key. Replace its contents with the following code:
```typescript
// publisher.ts
import { finalizeEvent, generateSecretKey } from "nostr-tools/pure";
import { Relay } from "nostr-tools/relay";
import { Keypair } from "@solana/web3.js";
const RELAY_URL = "wss://dev-relay.dephy.dev";
interface Message {
greeting: string;
solana_pubkey: string;
}
async function main() {
const relay = await Relay.connect(RELAY_URL);
// Generate a new Solana keypair and extract its public key
const solanaKeypair = Keypair.generate();
const solanaPubkey = solanaKeypair.publicKey.toBase58();
// Create a Message object
const message: Message = {
greeting: "Hello World",
solana_pubkey: solanaPubkey,
};
const eventTemplate = {
kind: 1573,
created_at: Math.floor(Date.now() / 1000),
tags: [
["s", "hello_session"],
["p", "receiver_pubkey"],
],
content: JSON.stringify(message),
};
const sk = generateSecretKey();
const event = finalizeEvent(eventTemplate, sk);
await relay.publish(event);
console.log("Published 'Hello World' event to", RELAY_URL);
console.log("Airdrop request for", solanaPubkey.toString());
}
main().catch(console.error);
```
***
### Step 6: Update the Subscriber
Edit `subscriber.ts` so that it parses the structured message, extracts the Solana public key, and requests a Solana airdrop. Replace its contents with the following code:
```typescript
// subscriber.ts
import { Relay } from "nostr-tools/relay";
import { Connection, PublicKey } from "@solana/web3.js";
const RELAY_URL = "wss://dev-relay.dephy.dev";
interface Message {
greeting: string;
solana_pubkey: string;
}
async function main() {
const relay = await Relay.connect(RELAY_URL);
console.log("Subscribed events on", RELAY_URL);
const solanaConnection = new Connection(
"https://api.devnet.solana.com",
"confirmed"
);
relay.subscribe(
[
{
kinds: [1573],
since: Math.floor(Date.now() / 1000),
"#s": ["hello_session"],
"#p": ["receiver_pubkey"],
},
],
{
onevent: async (event) => {
console.log("Received:", event.content);
const message: Message = JSON.parse(event.content);
if (message.solana_pubkey) {
const pubkey = new PublicKey(message.solana_pubkey);
// Request an airdrop of 1 SOL (1 SOL = 1_000_000_000 lamports)
const signature = await solanaConnection.requestAirdrop(
pubkey,
1_000_000_000
);
console.log(
`Airdrop requested for ${pubkey.toBase58()}. Signature: ${signature}`
);
// Confirm the transaction
const confirmation = await solanaConnection.confirmTransaction(
signature
);
if (confirmation.value.err === null) {
console.log(`Airdrop confirmed for ${pubkey.toBase58()}`);
} else {
console.error(
`Airdrop confirmation failed for ${pubkey.toBase58()}`
);
}
}
},
}
);
}
main().catch(console.error);
```
***
### Step 7: Run the Enhanced Example
Open two terminals (or tabs):
* Run the `Subscriber`:
```bash
bun run subscriber.ts
```
* Run the `Publisher` (in a new terminal):
```bash
bun run publisher.ts
```
* Expected Output:
* `Subscriber` terminal:
```
Subscribed events on wss://dev-relay.dephy.dev
```
* `Publisher` terminal:
Published 'Hello World' event to wss://dev-relay.dephy.dev
  Airdrop request for [ ... ]
* `Subscriber` terminal:
```
Received: {"greeting":"Hello World","solana_pubkey":"..."}
Airdrop requested for ... Signature: ...
Airdrop confirmed for ...
```
***
### Next Steps
This example demonstrates a basic integration between the Messaging Layer and Solana using Bun and TypeScript. You can extend this further by:
* Deploying a Solana smart contract (program) to handle more complex interactions
* Using Nostr events to trigger contract calls
* Implementing payment verification or other blockchain-based logic
* Adding error handling and retry mechanisms for airdrop requests
This simple integration opens the door to building decentralized applications that combine messaging capabilities with Solana’s high-performance blockchain.
Happy coding!
# Build a DeCharge Machine
Before proceeding, ensure you have cloned the [DePHY vending machine examples](https://github.com/dephy-io/dephy-vending_machine-examples) repository:
```bash
git clone https://github.com/dephy-io/dephy-vending_machine-examples.git
```
The DeCharge machine demonstrates a **continuous charging model**, where a device operates over time and charges users incrementally. Its messaging network leverages Nostr for event-driven communication, with Solana handling payments via `lock` and `settle`.
An online demo of these examples is available at:
## How to Run Locally
1. [Run DePHY messaging network](https://github.com/dephy-io/dephy-messaging-network-self-hosted/tree/main/dephy-messaging-network)
2. Run DePHY vending machine workers by: `docker compose up`
3. [Deploy the Solana program and run the dApp](https://github.com/dephy-io/dephy-vending_machine-examples/blob/main/balance-payment/README.md)
* The `docker compose` setup and the App demo application integrate both **DeCharge** and **Gacha** use cases.
* Ensure all dependencies are installed before running the application.
## Messaging
* **Message Definition**: Messages are defined as `DephyDechargeMessage` (in `message.rs`), with two variants:
* `Request`: Initiates a state change (e.g., user requests the machine to start).
* `Status`: Confirms a state update (e.g., machine is now Working).
```rust
pub enum DephyDechargeMessage {
Request {
to_status: DephyDechargeStatus,
reason: DephyDechargeStatusReason,
initial_request: EventId,
payload: String,
},
Status {
status: DephyDechargeStatus,
reason: DephyDechargeStatusReason,
initial_request: EventId,
payload: String,
},
}
```
* **Mention Tag (Machine Pubkey)**: The `p` tag identifies the target machine using its Nostr public key. For example, `PublicKey::parse("machine_pubkey")` specifies which device receives the message.
* **Session Tag**: The `s` tag scopes events to a specific session (e.g., "`dephy-decharge-controller`"), ensuring messages are isolated to the current context.
* **Publishing and Subscription**: The `RelayClient` publishes messages to a Nostr relay and subscribes to events using filters:
```rust
let filter = Filter::new()
.kind(EVENT_KIND) // Custom kind 1573
.since(started_at)
.custom_tag(SESSION_TAG, ["dephy-decharge-controller"])
.custom_tag(MENTION_TAG, [machine_pubkey.to_hex()]);
let sub_id = relay_client.subscribe(started_at, [machine_pubkey]).await?;
```
* **Filter**: Retrieves events since `started_at`, scoped to the session and machine pubkey.
* **Sender**: Typically a user or admin via the dApp or CLI.
* **Receiver**: The DeCharge node controller handling the machine.
* **Message Handling**: The MessageHandler processes events, updating machine states and coordinating with Solana.
## Building Controller
* **Node**: Listens for user `Request` events, verifies eligibility with `check_eligible`, and updates machine state (e.g., `Available` to `Working`). It notifies the server via `Status` events.
* **Server**: Monitors `Status` events, locks funds with `lock` when the machine starts, and settles the final amount with `settle` when it stops. This split ensures state management and payment processing are separate but coordinated.
## Solana Interaction
* **Controller**: Initiates state change and verifies eligibility
```rust
// Before: Received Request event to start machine
if dephy_balance_payment_sdk::check_eligible(
&self.solana_rpc_url,
parsed_payload.namespace_id,
&parsed_payload.user,
parsed_payload.nonce,
PREPAID_AMOUNT,
&parsed_payload.recover_info,
).await? {
// After: Send Status event to set machine to Working
self.client.send_event(mention, &DephyDechargeMessage::Status { ... }).await?;
}
```
* **Server**: Locks and settles funds
```rust
// When machine starts (Working status)
// Before: Received Status event indicating machine is Working
if let Err(e) = dephy_balance_payment_sdk::lock(
&self.solana_rpc_url,
&self.solana_keypair_path,
parsed_payload.namespace_id,
&parsed_payload.user,
PREPAID_AMOUNT,
&parsed_payload.recover_info,
).await {
// After: Send Request event to revert to Available if lock fails
self.client.send_event(mention, &DephyDechargeMessage::Request { to_status: DephyDechargeStatus::Available, ... }).await?;
}
// When machine stops (Available status after 60s)
// Before: Received Status event indicating machine is Available
if let Err(e) = dephy_balance_payment_sdk::settle(
&self.solana_rpc_url,
&self.solana_keypair_path,
&parsed_payload.user,
parsed_payload.nonce,
TRANSFER_AMOUNT,
).await {
tracing::error!("Settle failed: {:?}", e);
}
// After: No event sent; balance is settled
```
# Build a Gacha Machine
Before proceeding, ensure you have cloned the [DePHY vending machine examples](https://github.com/dephy-io/dephy-vending_machine-examples) repository:
```bash
git clone https://github.com/dephy-io/dephy-vending_machine-examples.git
```
The Gacha machine implements a single-charge model, charging a fixed amount for a one-time action (e.g., dispensing an item). It simplifies the messaging and payment logic compared to DeCharge.
An online demo of these examples is available at:
## How to Run Locally
1. [Run DePHY messaging network](https://github.com/dephy-io/dephy-messaging-network-self-hosted/tree/main/dephy-messaging-network)
2. Run DePHY vending machine workers by: `docker compose up`
3. [Deploy the Solana program and run the dApp](https://github.com/dephy-io/dephy-vending_machine-examples/blob/main/balance-payment/README.md)
* The `docker compose` setup and the App demo application integrate both **DeCharge** and **Gacha** use cases.
* Ensure all dependencies are installed before running the application.
## Messaging
* **Message Definition**: Same as DeCharge (`DephyDechargeMessage`), but typically only processes `Request` to `Working` and `Status` back to `Available`.
* **Mention Tag (Machine Pubkey)**: Identifies the GaCha machine (e.g., `PublicKey::parse("gacha_machine_pubkey")`).
* **Session Tag**: Scopes events (e.g., `"dephy-gacha-controller"`).
* **Publishing and Subscription**
```rust
let filter = Filter::new()
.kind(EVENT_KIND)
.since(Timestamp::now())
.custom_tag(SESSION_TAG, ["gacha_session"])
.custom_tag(MENTION_TAG, [gacha_machine_pubkey.to_hex()]);
let sub_id = relay_client.subscribe(Timestamp::now(), [gacha_machine_pubkey]).await?;
```
* **Sender**: User requesting a dispense.
* **Receiver**: Gacha node controller.
* **Message Handling**: Processes a single transaction and reverts state.
## Building Controller
* **Node**: Unlike DeCharge, Gacha’s simpler transaction (one payment, one action) doesn’t require a separate server. The node handles both state and payment in a single step using `pay`, making it lightweight.
## Solana Interaction
Uses `pay` for a one-time transaction:
```rust
// Before: Received Request event to start machine
if let Err(e) = dephy_balance_payment_sdk::pay(
&self.solana_rpc_url,
&self.solana_keypair_path,
parsed_payload.namespace_id,
&parsed_payload.user,
PAY_AMOUNT,
&parsed_payload.recover_info,
)
.await
{
tracing::error!("Failed to pay, error: {:?} skip event: {:?}", e, event);
return Ok(());
};
self.client
.send_event(mention, &DephyGachaMessage::Status {
status: *to_status,
reason: *reason,
initial_request: event.id,
payload: serde_json::to_string(&DephyGachaMessageStatusPayload {
namespace_id: parsed_payload.namespace_id,
user: parsed_payload.user.clone(),
nonce: parsed_payload.nonce,
recover_info: parsed_payload.recover_info.clone(),
})?,
})
.await?;
```
# Build a LLM Proxy
> This project is a fork of the [DePHY vending machine examples GitHub repository](https://github.com/dephy-io/dephy-vending_machine-examples), available at .
## How to Run
1. [Run DePHY messaging network](https://github.com/dephy-io/dephy-messaging-network-self-hosted/tree/main/dephy-messaging-network)
2. Run DePHY vending machine workers and backend by: `docker compose up`
3. [Deploy the Solana program and run the dApp](https://github.com/dephy-io/dephy-vending_machine-examples/blob/main/balance-payment/README.md)
* Ensure all dependencies are installed before running the application.
## Messaging
The LLM Proxy controller enables token-based access to a large language model via the DePHY messaging network. A key feature is the `Transaction` event, defined in `DephyDsProxyMessage`, which serves two critical purposes:
```rust
#[derive(Debug, Clone, Serialize, Deserialize)]
pub enum DephyDsProxyMessage {
// ... other variants (Request, Status) ...
Transaction {
user: String,
tokens: i64,
},
}
```
1. **Controller-Issued Transaction**: After a user recharges via Solana (verified with `dephy_balance_payment_sdk::pay`), the controller deducts the payment and emits a `Transaction` event. This grants the user a number of tokens for accessing the large language model, proportional to the recharge amount (e.g., 100 lamports = 100 tokens). Example:
* **Event**: `{ user: "user_pubkey", tokens: 100 }`
* **Purpose**: Signals that the user now has tokens available.
2. **Backend-Issued Transaction**: When the user interacts with the LLM through the backend and consumes tokens (e.g., during a chat session), the backend emits a `Transaction` event to reflect the deduction. This updates the user’s token balance. Example:
* **Event**: `{ user: "user_pubkey", tokens: -10 }`
* **Purpose**: Indicates 10 tokens were consumed, reducing the user’s balance.
These `Transaction` events are published to the Nostr relay with the **p** tag (e.g., "`dephy_dsproxy-controller`") and **s** tag (e.g., "`machine_pubkey`"), allowing both the controller and backend to track and synchronize token balances efficiently.
## Build Controller
* **Node**: The controller listens for user Request events to recharge tokens, processes payments and grants tokens in a single step using pay via Solana, issuing Transaction events.
* **Backend**: The backend subscribes to `Transaction` events to index token balances. When LLM usage consumes tokens, the backend publishes `Transaction` events with **negative values**, which the controller can log or validate, ensuring synchronized token tracking via the messaging layer.
## Solana Integration
Uses `pay` to deduct payment and grant tokens:
```rust
// Before: Received Request event to recharge tokens
if let Err(e) = dephy_balance_payment_sdk::pay(
&self.solana_rpc_url,
&self.solana_keypair_path,
&parsed_payload.user,
PAY_AMOUNT, // e.g., 100 lamports
&parsed_payload.recover_info,
).await {
tracing::error!("Failed to pay, error: {:?}", e);
return Ok(());
}
// After: Send Transaction event to grant tokens
let tokens = PAY_AMOUNT as i64 * TOKENS_LAMPORTS_RATIO;
self.client.send_event(
mention,
&DephyDsProxyMessage::Transaction {
user: parsed_payload.user.clone(),
tokens
},
).await?;
```
# AI MCP Services
# About MCP
## What is MCP
MCP is an open protocol that standardizes how applications provide context to LLMs. Think of MCP like a USB-C port for AI applications. Just as USB-C provides a standardized way to connect your devices to various peripherals and accessories, MCP provides a standardized way to connect AI models to different data sources and tools.
## Why MCP?
MCP helps you build agents and complex workflows on top of LLMs. LLMs frequently need to integrate with data and tools, and MCP provides:
* A growing list of pre-built integrations that your LLM can directly plug into
* The flexibility to switch between LLM providers and vendors
* Best practices for securing your data within your infrastructure
> For more info about MCP please visit:
## Why DePHY for MCP?
In short:
* Hosting MCP servers requires professional prgramming skills
* Running every one of MCP servers locally can cost a lot computer resource
* Hosting unknown MCP servers leads to security problem
* Some services(scraping, searching) need a lot of residential IPs
DePHY Service Mesh provides common MCP servers with one unified endpoint, enabling additional features for your AI clients.
# How to Enable DePHY MCP Server
1\. Register an Account
Visit and register an account
## 2. Get an API Key
Visit [API Keys page](https://mesh.dephy.io/dashboard/api-keys) to check if you have at least one API key.
If there's no API keys available, click **Generate New API Key** to generate a new one.
## 3. Copy the MCP Endpoint URL(s)
Visit [Service page](https://mesh.dephy.io/dashboard/services) to get the endpoint URL(s).
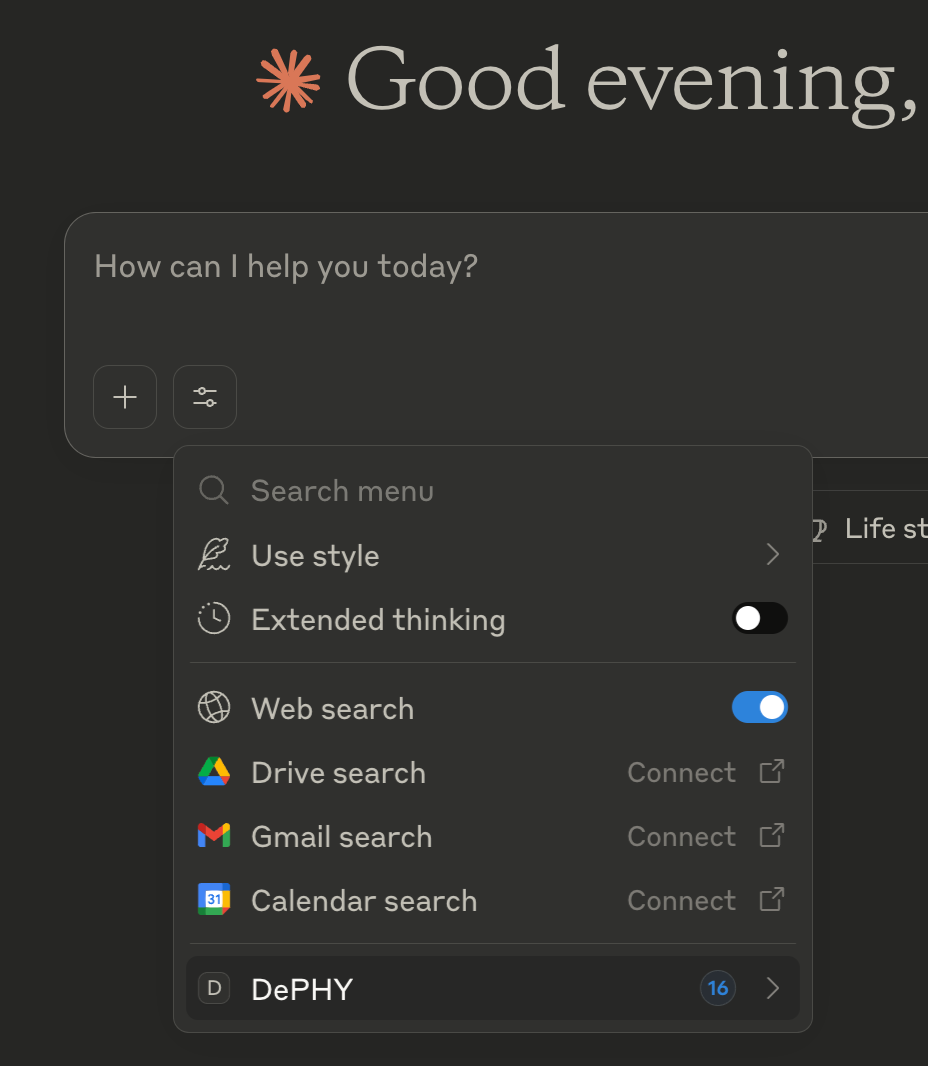
Currently(20250509) we have 5 different MCP servers with 16 tools together. We highly recommend you copy the **Unified Service Endpoint** URL to use. It's an aggregator of all MCPs. If you have special needs you can still copy the separating service URLs.
## 4. Paste MCP Endpoint URL to Your AI Clients
For now our endpoint is SSE type MCP endpoint, please choose a SSE-MCP-supported clients to enable it.
We recommend serveral AI clients:
* [ChatWise](https://chatwise.app?atp=nVf4iC) (macOS, Windows)
* [OpenCat](https://opencat.app/) (macOS, iOS, iPadOS)
* [CherryStudio](https://www.cherry-ai.com/) (macOS, Windows, Linux)
Paste the MCP endpoint to your AI client MCP setting page:
* Choose a name(or id) for this MCP
* Paste the link
* Choose the type SSE
* We highly recommend you check "without confirmation" or "no confirmation" checkbox to make it run smoothly.
Screenshot of ChatWise MCP setting
Screenshot of OpenCat MCP setting
Screenshot of CherryStudio MCP setting
For clients don't support SSE type(for example Claude), you can still use it by using a bridge tool. In this example we use `mcp-remote` in `claude_desktop_config.json` :
{% code overflow="wrap" %}
```json
{
"mcpServers": {
"DePHY": {
"command": "npx",
"args" : [
"mcp-remote",
"https://mcp-demo.dephy.dev/mcp/{replace-your-api-key-here}/sse",
"--transport",
"sse-only"
]
}
}
}
```
{% endcode %}
## Check if MCP is Enabled
Once MCP server is enabled, you can see a tool toggle button in most AI chat apps:
ChatWise MCP Toggle Button
OpenCat MCP Toggle Button
CherryStudio MCP Toggle Button
Claude MCP Toggle Button
If DePHY MCP doesn't appear in your chat app, please recheck your settings.
{% hint style="info" %}
For some apps(like Claude), you need to quit and restart the app to enable the new-added MCP server.
{% endhint %}
# How to use DePHY MCP
## TL;DR;
Please check this video for the tutorial:
{% embed url="" %}
## Enable DePHY MCP
If you haven't enable DePHY MCP server, please check this link first:
{% content-ref url="/pages/Frb5bU5obCU40xz4ndOg" %}
[How to Enable DePHY MCP Server](/service-mesh/ai-mcp-services/how-to-enable-dephy-mcp-server)
{% endcontent-ref %}
## Available Tools
Click "View Tools" to show tools we support:
ChatWise
Claude
## Usage Examples
### Google Maps:
Ask anything about locations or maps:
Details about calling DePHY MCP server:
### Search
### Sequentail Thinking
# For Developers
#### 👌 **1. Register a Topic (Create Stream)**
Frontend: 👉
1. Open the sidebar → **Create Stream** tab.
2. Fill in:
* **Name** — Topic name
* **Description** — optional
* **Admin** — nostr pubkey of the topic administrator
* **Publish Mode** — *Public* or *Private*
* **Access Mode** — *Public*, *Private*, or *Subscription*
3. Click **Create Stream**.
**Mode Notes**
| Mode Type | Option | Description |
| ---------------- | ---------------- | ------------------------------------------------------------------------------------------------------ |
| **Publish Mode** | **Public** | Any nostr pubkey can publish events. |
| | **Private** | Only nostr pubkeys explicitly granted publish rights by Admin can publish. |
| **Access Mode** | **Public** | Everyone can view/subscribe. |
| | **Private** | Admin must grant access to each nostr pubkey. |
| | **Subscription** | Access requires payment (token + monthly fee). After payment and an auth epoch, access becomes active. |
> ⚙️ **Auth Epoch Delay:** After granting permissions or processing payment, expect a short delay (\~5 min by default) before the auth service updates. You can adjust this in your deployed `dephy-mn-auth` configuration.
***
#### 👌 **2. How to Get Access to a Topic**
1. Open the sidebar → **Streams** tab.
2. Open **qingping\_air\_monitor** stream.
| Topic Type | Access Instructions |
| ---------------- | -------------------------------------------------------------------------------------------------------- |
| **Public** | No setup needed — open the Stream page. |
| **Private** | Ask the Admin to `grant access` to your nostr pubkey. Wait one auth epoch, then authenticate and access. |
| **Subscription** | Click **Subscribe** → complete payment → wait for auth epoch → refresh Stream page. |
> Admins can manage permissions (`grant/revoke publish` / `grant/revoke access`) from the **Streams** tab when signed in.
***
#### 👌 **3. How to Subscribe to a Topic**
1. Open the Topic page.
2. If it’s a **Subscription** type, click **Subscribe** and complete payment.
3. Wait for the auth epoch (\~5 min).
4. Refresh to view stream events.
***
#### 👌 **4. Add a New Device Type to `hass2nostr`**
Device modules live under: `src/device-types/*.ts`
Each must export:
| Export | Description |
| --------------------------------- | ---------------------------------------------------------- |
| `entityPrefixes: string[]` | List of entity\_id prefixes to match in Home Assistant. |
| `allowedEntitySuffixes: string[]` | Limits which entity\_ids under those prefixes are used. |
| `allowedAttributes: string[]` | Keys to keep in the truncated attributes. |
| `truncateAttributes(attributes)` | Function to return only permitted attributes. |
| `processState(hassState[])` | Processes/truncates states. Usually wraps `truncateState`. |
| `simulateHassState(device)` | Generates fake Home Assistant states for simulation. |
**Implementation Notes**
* See examples: `qingping_air_monitor.ts`, `chunmi_tsa1.ts`, `zhimi_mp4a.ts`
* The CLI imports these modules (`src/cli/bridge.ts`, `src/cli/simulate.ts`) and filters Home Assistant states accordingly.
* Keep filename = deviceType name (e.g. `-w qingping_air_monitor` loads `src/device-types/qingping_air_monitor.ts`).
**Minimal Checklist**
1. Create `src/device-types/.ts`
2. Export required constants/functions
3. Implement `truncateAttributes()`
4. Add `processState()` and `simulateHassState()`
5. Test with:
```bash
deno task run simulate -r wss://canary-relay.dephy.dev -w
```
**Example**
```ts
export const entityPrefixes = ["sensor.my_vendor_thing_"];
export const allowedEntitySuffixes = ["temperature", "humidity"];
export const allowedAttributes = [
"state_class",
"unit_of_measurement",
"device_class",
];
export function truncateAttributes(attrs) {
const allowed = {};
for (const key of allowedAttributes) {
if (key in attrs) allowed[key] = attrs[key];
}
return allowed;
}
export function processState(states) {
return states.map((s) => truncateState(s, truncateAttributes));
}
export function simulateHassState(device) {
// Return mock HassState[] for testing
}
```
***
# For Data Providers
This section covers **simulation** and **real Home Assistant bridging**.
***
#### 🧪 **A. Simulate Device Data (Recommended First Step)**
Before using real Home Assistant, test your setup with the built-in simulator.
**👌 1. Clone and Prepare**
```bash
git clone git@github.com:dephy-io/hass2nostr.git
```
**👌 2. Install** [**Deno**](https://deno.land/manual/getting_started/installation)
**👌 3. Configure Environment**
```bash
cp .env.example .env
```
Then edit `.env` and fill in your **Nostr secret key**:
```
DEPHY_SECRET_KEY=
```
> 💡 **Note:** When running the **simulator**, only `DEPHY_SECRET_KEY` is required. You don’t need `DEPHY_HA_TOKEN` — that token is only necessary later when running the **bridge** with a real Home Assistant connection.
**👌 4. Run the Simulator**
```bash
deno task run simulate \
-w chunmi_tsa1 \
-r wss://canary-relay.dephy.dev \
-o playground \
-m cdb9247ec7ab3302fd12450ae7453ab9f833639f109833f06c5d909991d62a3c
```
**Flag Reference**
| Flag | Description |
| ---- | ---------------------------- |
| `-r` | Relay WebSocket endpoint |
| `-w` | Device type(s) to simulate |
| `-o` | Target Topic name |
| `-i` | Interval (ms) between events |
| `-m` | Controller pubkey to mention |
***
#### 🏠 **B. Bridge to Real Home Assistant**
This section explains connecting a real HASS instance and running the bridge.
***
**👌 1. Run Home Assistant via Docker**
```bash
sudo docker pull homeassistant/home-assistant
docker run -d \
--name homeassistant \
--privileged \
--restart=unless-stopped \
-v /data/homeassistant:/config \
--network=host \
homeassistant/home-assistant
```
***
**👌 2. Install HACS & Xiaomi Integrations**
```bash
sudo docker exec -it homeassistant bash
wget -O - https://get.hacs.xyz | bash -
exit
sudo docker restart homeassistant
```
Then in the web UI (`http://192.168.x.x:8123`):
1. **Settings → Devices & Services → Integrations**
2. Click **Add Integration** → Search for **HACS**
3. Authorize GitHub, restart if prompted
4. In HACS: **Explore & Download Repositories → Search “Xiaomi Home” (or “Xiaomi Miot”)** → **Download**
5. Restart Home Assistant
6. **Settings → Devices & Services → Add Integration → Xiaomi Home**
7. If redirect URL fails (`homeassistant.local`), replace with your IP (e.g. `http://192.168.x.x:8123/...`)
***
**👌 3. Generate a Long-Lived Access Token**
1. Click your **user profile** (bottom-left).
2. Scroll to **Long-Lived Access Tokens**.
3. Click **Create Token**, name it, and **copy** immediately.
4. Store it securely — it’s shown only once.
Add it to `.env` as:
```
DEPHY_HA_TOKEN=
```
***
**👌 4. Configure the Bridge Environment**
1. **Clone the repo** (if not already):
```bash
git clone git@github.com:dephy-io/hass2nostr.git
```
2. **Install Deno** (see [deno.land](https://deno.land)).
3. **Add `.env`:**
```
DEPHY_SECRET_KEY=
DEPHY_HA_TOKEN=
```
4. Verify the needed device type exists in `src/device-types/`.
* If not, create or adapt one per developer section above.
***
**👌 5. Run the Bridge**
Default controller pubkey:
```
cdb9247ec7ab3302fd12450ae7453ab9f833639f109833f06c5d909991d62a3c
```
Run:
```bash
deno task run bridge \
-r wss://canary-relay.dephy.dev \
-w qingping_air_monitor \
-o qingping_air_monitor \
-i 300000 \
-m cdb9247ec7ab3302fd12450ae7453ab9f833639f109833f06c5d909991d62a3c
```
**Flag Reference**
| Flag | Description |
| ---- | ------------------------------------------- |
| `-r` | Relay WebSocket endpoint |
| `-w` | Device type module (in `src/device-types/`) |
| `-o` | Target Topic name |
| `-i` | Publish interval (ms) |
| `-m` | Controller pubkey to mention/notify |
**Runtime Notes**
* The bridge polls `/api/states` from HASS, filters by your module’s `entityPrefixes` and `allowedEntitySuffixes`, truncates attributes, and publishes to the relay as Nostr events.
* If a value is non-numeric, that entity will be skipped automatically.
***
**👌 6. Monitor Your Stream**
1. Open your Topic in the frontend.
2. Ensure Access Mode and grants/subscriptions are valid.
3. Wait for one auth epoch (\~5 min).
4. Events will appear if you are authorized and the bridge is publishing successfully.
***
# Get a DePHY Node
DePHY Nodes serve as the critical infrastructure backbone of the network, enabling secure and decentralized communication between DePIN devices and the Solana blockchain.
## Buy a DePHY Node
# Set Up a DePHY Node
## 1. Preparation Before Initial Boot
* Power adapter
* HDMI cable
* Monitor
* Keyboard
### 2. Connect the Node
* Connect the HDMI cable to the monitor and the node
* Plug in the power adapter to the node
* The device will typically boot automatically when the power is connected. If it does not boot, press the round power button on the front panel to start it.
## 3. Log in
If a login prompt appears on the screen, use the following credentials:
ID: admin
Password: admin
Sample outup while logging in
{% hint style="info" %}
While typing in the password, it's normal when the password doesn't appear on the screen. It's hidden for security reason.
{% endhint %}
## 4. Network Configuration After Login
### Wifi Configuration
{% hint style="info" %}
If you are using a cable to connect your node, please skip this step check the below [Ethernet Connection](#ethernet-connection) step.
{% endhint %}
Use the following command to connect to Wi-Fi by replacing your real SSID and password:
```bash
sudo nmcli dev wifi connect "YourSSID" password "YourPassword"
```
### Ethernet Connection
{% hint style="info" %}
If you don't have a network cable connecting your node, please check the above [Wifi Configuration](#wifi-configuration) guide.
{% endhint %}
For most cases, a wired connection should automatically assign an IP address when the cable is connected. However, it is not confirmed if this device is pre-configured for automatic DHCP.
## 5. Check the IP Address
After configuring the network, use the following command to check the device’s IP address:
```bash
ip address
```
IP showed under the wlan0 section
## 6. Setting Up SSH Terminal for Command Convenience
To easily copy and paste commands, connect to the device via an SSH terminal using tools like ***Putty*** or ***Termius***.
Configure the terminal with the device’s IP address and log in using:
ID: admin
Password: admin
## 7. Execute the Following Command After Login
Replace `{replace with your Solana address}` with your real Solana address:
{% code overflow="wrap" %}
```bash
docker run --restart always --network host --name worker --volume $HOME/data:/opt/dephy-worker/data -d dephyio/dephy-testnet2-worker --owner-solana-address {replace with your Solana address} && sudo docker logs -f --tail 10 worker
```
{% endcode %}
Sample output after typing the command
## 8. Check Registration Status
After confirming your owner address, visit to verify if your worker has been successfully registered.
{% hint style="info" %}
Note: It may take a few minutes to appear on the website.
{% endhint %}
## 9. Migrate to the Testnet2 from Testnet1
{% hint style="info" %}
You need to do this ONLY if your node already participated Testnet1, or you can skip this chapter.
{% endhint %}
Please check the guide:
{% content-ref url="/pages/J7cAQpGWXTB3XZPOBB1c" %}
[Migration From Testnet1 to Testnet2](/dephy-node/migration-from-testnet1-to-testnet2)
{% endcontent-ref %}
## Frequently Asked Questions
{% content-ref url="/pages/BNLcQIvGyUwTfn0tbY0B" %}
[Node Setup FAQ](/dephy-node/node-setup-faq)
{% endcontent-ref %}
# Migration From Testnet1 to Testnet2
{% hint style="info" %}
You need to do this ONLY if your node already participated Testnet1, or you can skip this page.
{% endhint %}
## 1. First Testnet → Second Testnet Migration Guide
* First -> Second Migration Steps (ONLY APPLICABLE FOR EXISTING TESTNET1 NODES)
* Save your points mined from the testnet1 (wallet connection must use the same Solana-based wallet address that you will use for the next stop right below):
## 2. Open your SSH tool (e.g., Termius) and execute the following command:
{% code overflow="wrap" %}
```bash
sudo docker rm --force worker && docker run --restart always --network host --name worker --volume $HOME/data:/opt/dephy-worker/data -d dephyio/dephy-testnet2-worker --owner-solana-address {replace with your Solana address} && sudo docker logs -f --tail 10 worker
```
{% endcode %}
Note: If your current docker container is named worker1, you need to modify the command to
```bash
sudo docker rm --force worker1
```
## 3. Execute the Following Command After Login:
{% code overflow="wrap" %}
```bash
docker run --restart always --network host --name worker --volume $HOME/data:/opt/dephy-worker/data -d dephyio/dephy-testnet2-worker --owner-solana-address {replace with your Solana address} && sudo docker logs -f --tail 10 worker
```
{% endcode %}
## 4. After confirming your owner address
Visit to verify if your worker has been successfully registered.\
Note: It may take a few minutes to appear
## Frequently Asked Questions
{% content-ref url="/pages/BNLcQIvGyUwTfn0tbY0B" %}
[Node Setup FAQ](/dephy-node/node-setup-faq)
{% endcontent-ref %}
# Node Setup FAQ
Frequently Asked Questions
**Q: How do we pay for the transaction cost or the worker registration fee? How is it going to change from testnet phase-1 -> testnet phase-2 -> Mainnet Beta?**
A: In testnet phase-1, as you can recall, the DePHY Team covered the gas fees for each worker/node registration cost and mining points by providing a seed-phrase with a small amount of funds.
For testnet phase-2, which will run for about a month until just before TGE, worker/node registration and point mining will be free of charge, so you can use an empty Solana wallet with no assets. (Your seed-phrase from testnet-1 will no loger require)
However, when the all testnet phase 1 & 2 end and Mainnet Beta begins, you must have a small amount of $SOL token in your connected Solana wallet address. Thanks to solana’s low transaction fees, having a small amount of sol in your wallet will be more than enough to cover all costs.
Finally, before 'Mainnet Beta', we will launch a mint dApp to register workers as DIDs, which will have a one-time fee (for minting DIDs, not for profit). 'Mainnet Beta' will require ALL workers to be registered on Solana before onboarding.
**Q: How long is the testnet migration period open? Will my testnet points automatically carry over to Testnet2?**
A: Testnet1 will continue until Testnet2 ends (a month long)) and through to the TGE & 'Mainnet Beta'. After migration, user points from testnet1 will be snapshot and saved and accumulated for the TGE stage, and you'll start with 0 points in the new testnet2. After TGE, all points accumulated across testnets will be combined, and 5% of the total token supply (allocated for testnet rewards) will be distributed proportionally based on users' total points.
**Q: Why aren't points updating in real-time on the migration page?**
A: Points are updated manually by the DePHY Team on a weekly basis. Please use to check your points from testnet1.
# Stake/Unstake PHY/stPHY to a Node
1. Navigate to
2. Find ***DePHY Node Staking*** in the navigation menu
3. Click ***Manage*** button on a DiD node
4. Change your options:
1. 1️⃣ Stake or Unstake
2. 2️⃣ PHY or stPHY
3. 3️⃣ Input the amount
# Stake PHY without a Node
1. Navigate to
2. Find ***PHY Staking*** in the navigation menu
3. Stake or unstake at this page
# Claim Staking Reward
1. Navigate to
2. Find ***Dashboard*** in the navigation menu
3. Click Claim button to claim all of your reward
# Swap from stPHY to PHY
1. Option 1: Unstake stPHY and wait for 21 days.
2. Option 2: Swap from a DEX to get PHY immediately
# Bridge PHY token between chains
1. Navigate to
2. Select your source chain and destination chain
3. Connect your wallet and input the number, follow the steps to bridge
4. If you cannot receive token, please try to resume your transaction:
1. Click ***Resume Transaction*** button
2. Select your source chain and input your transaction hash
3. Follow the steps to resume your transaction
4. If it cannot help, please visit our Discord and submit a ticket. Don't trust fake DMs.
# 🆕 DOD Introduction
Introduction
### What is DOD?
DOD stands for DePHY Official Delegation, which delegates (stakes) officially held stPHY tokens to community nodes based on their contribution. Created to maximize the decentralization, reliability, and performance of the DePHY network, DOD expands the number of nodes with diverse pledge sources while maintaining a large and representative mainnet-beta network. The program incentivizes community participation to ensure network robustness and security, laying the groundwork for a sustainable DePHY ecosystem.
### What are the benefits of DOD?
#### Increased decentralization of the network
After launching the staking campaign, we observed that a small number of nodes gained significantly more than ordinary nodes through high stakes. This issue, reported by the community, caused the network to favor a very small number of nodes, reducing decentralization. Consequently, a minority of nodes earned higher mining revenue while most community members earned less.
We're now taking action to balance the amount and weight of staked tokens in the network, allowing well-performing nodes to receive free pledges and increase decentralization.
#### Balancing node gains
Once DOD launches, the system's Gini coefficient will be greatly reduced, effectively mitigating the ultra-high gains of single nodes. Low-staking nodes can receive official stake delegation for free, dramatically increasing the earnings of individual participants who only need to contribute to the network.
#### Priority participation in testing services
We will soon launch the first round of testing for additional services that provide decentralized data transmission for third parties, including AI, DePIN, and RWA projects. Nodes participating in DOD will receive priority access to these testing services and additional revenue opportunities.
### How to participate in DOD?
#### Basic Participation Conditions
| Standard Description | Standard Requirements | Comments |
| ---------------------- | -------------------------------- | ------------------------------------------------------------------------------------------------------- |
| Last 120h online hours | >90% of the time | |
| Running Node Version | See latest official requirements | |
| Number of self-stake | >5000 | Staking other than DOD and other third party delegation is considered as self-stake, in terms of stPHY. |
| Blacklisted | Not blacklisted | Malicious nodes will be blacklisted |
#### Technical Indicators
| Standard Description | Comments | Abbreviation |
| ------------------------------------ | ------------------------------------------- | ------------ |
| Last 120h online hours | Hourly | UP120 |
| Last 2160h online | Hourly | UP2160 |
| Number of self-collateralized stPHYs | 7-day average number of self-pledged stPHYs | SS |
| Number of total encumbrances | 7-day average total stPHY | TS |
#### Scoring Method
Score is calculated based on a combination of the following metrics that determine a node's ranking and allocation in the DOD program:
$$
Score = UP120(%) \times 0.4 + UP2160(%) \times 0.3 + \frac{SS}{TS} \times 0.3
$$
Among them:
* ***UP120*** is weighted at 40% to ensure recent stability of the node
* ***UP2160*** is weighted at 30% to ensure long-term stability of the node
* Self-stake ratio (***SS***/***TS***) is weighted at 30% to encourage node operators to stake in themselves.
This scoring considers the short-term and long-term stability of the node, as well as the percentage of the operator's own investment, rather than relying solely on pledge numbers. This ensures network decentralization and overall health while preventing overweighting of nodes with large stakes.
As an example:
Node A has participated in the network for 2160 hours and has only 5000 self-stake, then
Score = 1×0.4 + 1×0.3 + 5000/5000×0.3 = 1.0
After node A gets the official 20000 DOD delegation stake, then
Score = 1×0.4 + 1×0.3 + 5000/25000×0.3 = 0.76
Node B has only been running for 500 hours in total, 495 hours of active time, and has 50000 self-stake.
Score = 495/500×0.4 + 495/2160×0.3 + 50000/50000×0.3 = 0.76475
After node B gets the official 20000 DOD delegation stake, then
Score = 495/500×0.4 + 495/2160×0.3 + 50000/70000×0.3 = 0.6790357143
In this example, we can see that a well-participated node will rank higher than nodes with high stakes but short uptime.
#### Sorting method
All nodes are sorted in descending order according to their Score, and the top 5000 nodes will receive DOD delegation.
#### Calculation Period
Calculated every 7 days (168 hours), with minor time variations possible.
#### Delegation Cancellation Criteria
Criteria Cancellation:
After all nodes are sorted by Score in descending order, nodes ranked within the top 7000 will continue to receive DOD delegation. If a node's ranking falls below 7000, its delegation will be canceled.
Immediate Cancellation:
1. Nodes that have been blacklisted will have their pledges canceled immediately.
2. Pledges will be canceled immediately if a node's accumulated offline time exceeds 24 hours.
3. Other behaviors that are detrimental to the network's operation
Nodes affected by Criteria Cancellation can still participate in the next round of ranking.
Nodes subject to Immediate Cancellation from DOD, except those blacklisted, can still participate in the next round of ranking.
### DOD Vault Quantity
Currently, the initial vault quantity is 200 million or 200,000,000 stPHY, which may be adjusted later.
# Papers
## WhitePaper
{% file src="/files/Lm5lsR44qHXMwIcm6dJx" %}
## Tokenomic Paper
{% file src="/files/y1cPlOPrAysqyRDZ2qVT" %}